Different Methods for Sharpening a Serrated Knife
Method #1. Sharpening with a Ceramic Sharpening Rod
Using a ceramic sharpening rod can be harder than the other methods. in fact, using a ceramic knife sharpener to sharpen your serrated knife blade will take a quite long time, but the result is worth it!
A ceramic rod is ideal if there are any bent points on your serrated knife blade, or if it has been a long time since you sharpened it. Here is the right way to sharpen your high quality serrated knife with a ceramic honing rod.
Read also , Things to Consider When Buying an Electric Knife Sharpener
Step
1. Choose the side of your serrated knife with a beveled edge
The knife’s serrations are only located on one side of your knife. it has a part called a bevel. You need to sharpen the other side just like any other straight edge. So, apply your rod only on the beveled side.
2. Put the sharpening rod in each serrated gullet
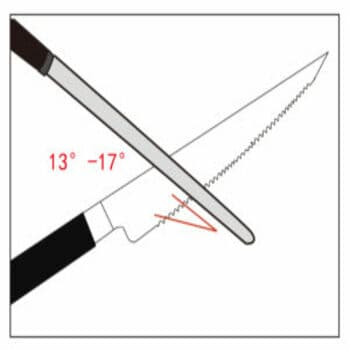
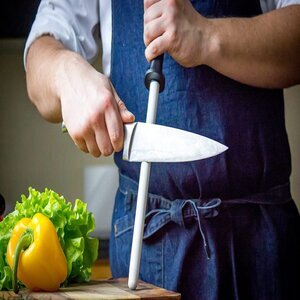
Grasp your serrated edge and let the tip of the knife away from you. Put the ceramic sharpening rod in each serration. Adjust the angle of the sharpening steel with each gullet so that it resembles the original sharpening angle of 13 to 17 degrees.
- You can use a marker as a guide. If you remove the marker tag while passing the rod, then you are on the right track.
3. Match the sharpening steel with the diameter of the serration.
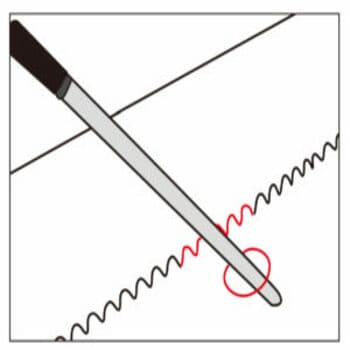
If you have a tapered sharpening rod, fit the cone-rod with the serration. As a result, the diameter of the tapers is the same size as the serration. And don’t make the serration wide by choosing a different diameter.
4. Wear gloves for your own safety.
Wear gloves to avoid hurting yourself as the sharpener may tear your finger
5. Sharpen the first serration
Push the cone-rod through the serration with gentle moving, typically for a couple of strokes. You only have to push in one direction away from the edge of the blade until you reach the spine of the rod.
I do not recommend passing the rod back and forth. Instead, you can rotate or flip the sharpening rod for a consistent sharpening. Draw the cone-rod slowly away from the blade each time to protect yourself from the edge of the knife.
Check also, 10 Best Bread Knife 2022 Review
6. Repeat the process for the desired progress.
In this step, you just have to repeat the process of passing the rod through the knife’s serrations. it will take from 5-8 strokes to sharpen the edges of your knives if you choose the right angle.

7. Use a leather strop to get all the burr removed.
After doing several strokes, you will get metal shavings, which are called “burr.” Pass the back of the knife against a leather strop, which will eliminate any burr. Then your serrated blade can provide you with the perfect slices.
Summary
Such a method that you will work on manually will sharpen a serrated knife perfectly. However, this knife sharpener tool needs effort.
Method #2. Spyderco Sharpmaker
This method is similar to the prementioned ceramic honing rod. Spyderco Sharpmaker will work with both serrated knife blade and straight edge one. For this reason, a lot of people tend to go with this method.
Unlike the ceramic serrated knife sharpener that works by rotating the rod, here the edge of the Spyderco Sharpmaker is rocked back and forth.
Read more , How to Care for Your Paring Knife?
Steps
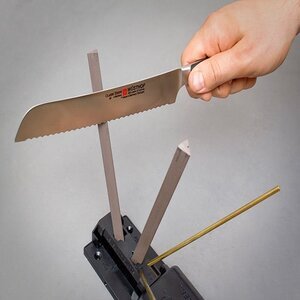
1. Place the specific triangle sharpening steel
Set your Sharp maker apparatus on any cutting board or hard ground. Put the specific triangular rods in the holders of the sharp maker, and you will get the job done.
- Do not forget to expose the triangular point of the rods to the serrated gullet side of the knife. Also, locate the flat side of the rods on the backside to be for the plain straight edge side of the blade.
2. Choose the right angle and pass the knife.
Slide your serrated knife in a gentle way across the rods of the Spyderco sharp maker. Choose a slight angle and pass it several times for each face of your knife. And try to be much slower on the serrated edge so that you will not damage the gullets.
3. Use the chock-up technique
Choke-up the dullest parts of your serrated edge to wrap the whole side.
4. Pass it for several strokes.
Continue repeating this process for 5 or 6 strokes on each side of your edge. Do not forget to set an angle for your serrated edge that matches the rod just as the first secure method.
5. Eliminate the burrs.
Remove the burrs by angling the edged blade a little bit far. Make sure it still won’t damage the backside of the knife by scratching it.
6. Use a leather strop to move away from all the remaining burrs.
Summary
Spyderco Tri-Angle Premium Sharpmaker is designed to hone the teeth of your manual or electric knife. It works excellent for medium-sized knives. Feel free to contact the manufacturer if you have any questions about the product
Method #3. Use a Electric Serrated Knife Sharpener
Read more , How to shuck oysters without an oyster knife
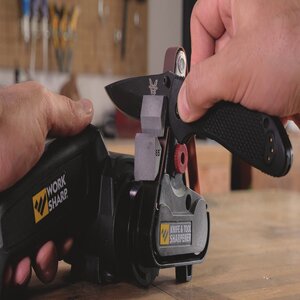
One of the best recommendations is Work Sharp knife and tool sharpener. This electric serrated knife sharpener is ideal for polishing and maintaining the knife’s serrations. It is perfect for your bread knife, steak knife and any kitchen knife blade.
Only use a 6000-grit belt. If you choose a grit that is more than this, it will impact your gullets.
Steps
1. Read the Illustration Guide
Follow the suggested instructions guide of this Work electric knife sharpener to keep your thumb safe.
2. Adjust the right belt properly
Put the 6000-grit belt on the Work Sharp’s Knife and Tool Sharpener.
3. Adjust the guiding power
Tackle the flat side of your serrated knife and put in the guiding power over the Work Sharp sharpener. Then pull the serrated blade slowly across the guide. It will take just about to hone that fine edge.
Also read , How to Hone Your Knife? | Easy Guide
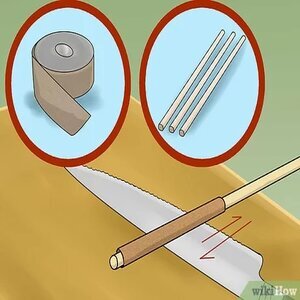
Method #4. Emery Cloth and Dowels
Steps
1: Buy an Adequate Dowel
Choose a dowel that matches the size of the first serration of your knife without in the knife’s first scallop without rocking. Go with a round dowel if you have round serrations. If you have a V-shaped serration, then get a squared-dowel.
2. Coat the Dowel with Emery Cloth
Coating the entire dowel with a piece of emery cloth is an essential step. Drag the cloth tightly with your finger and fully resharpen the knife.
3. Match the Gullets
Try to match each gullet’s opening of the kitchen knife by changing the dowels during the process of sharpening, and you will notice the difference.
Also check, What are the Benefits of Oysters? | 7 Healthy Advantages
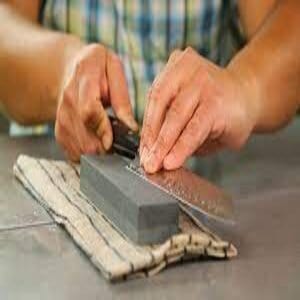
Method # 4. Sharpening with a Square Stone
Steps
1. Adjust the knife
Put the spine of your serrated knife carefully over a hard surface. Then make sure that the bevel edge of the chef’s knife you own is facing you by leaning the blade’s edge.
2. Grasp the stone correctly
Take the side of the stone to your serrated edge to sharpen the teeth of your knife. And rock the stone in a back and forth motion so that you cover the whole steel edge.
Summary
Using a square stone to give your serrated knife a meaning may not be the best tool for your edge. However, it may work better than a pen-shape sharpener. So, do not worry about trying this method.